This wizard helps you through the process in a quick and user-friendly way.
You start the wizard by clicking Image > Acquire with Process Wizard.
A new window will open allowing you to choose how you wish to import your image.
You can either load a media file (image or video), Import from scanner, choose an image from Google Maps, Import from clipboard or load a frame directly from a camera.
Step 1: Select image
As an example, we can choose to load a simple image file from your computer.
Click on the first selection Add image from media file to select your image from the file browser.
Step 2: Adjust image
After choosing your image, you can adjust the color, zoom, rotate and correct the image if it is tilted. Click on the arrow at the middle of the right side to get to the next step, where you calibrate the image.
Step 3: Calibration
 In order for Image Measurement to measure your image correctly and according to the scale and distance of the object we need to calibrate the image.
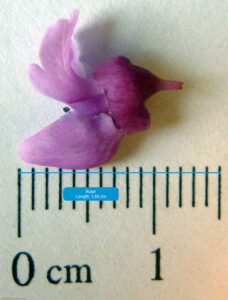
The image is calibrated by defining a line and giving that line a length and measuring unit. In this case we have part of a ruler showing 1.5 cm.
The blue line is the ruler we have added in Image Measurement, telling the software that this long line is 1.5 cm long. Because the ruler is at the same level as the flower, we can now start measuring.
Step 4: Measuring
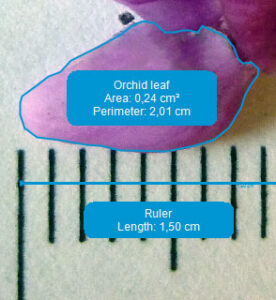
You can now start measuring your image. See the articles below on how to use the different measuring methods.
Step 5: Finish
Click on the Finish button at the top, when you are done measuring your image. Your results will be visible in Image Measurement afterwards.