Before you start, remember to load an image and calibrate.
 By clicking
To measure area and circumference with the ![]() (Area Measurement) tool, left-click once to initiate the drawing. Left-click around the edges of the objects to trace the contours. Use as many or as few points as you wish. The figure is closed automatically, and double-left-click on the last point to end the drawing.
(Area Measurement) tool, left-click once to initiate the drawing. Left-click around the edges of the objects to trace the contours. Use as many or as few points as you wish. The figure is closed automatically, and double-left-click on the last point to end the drawing.
By drawing
You can also draw normally by just holding down the left mouse button. It is however a bit more difficult to be accurate. Here you also need to double left-click to end the measurement.
Automatic detection
‘ The magic wand is used to automatically detect a figure on the image. To measure area and circumference with the
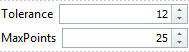
 ![]() (Magic Wand) tool, adjust the tolerance and max points in the Settings menu. The tolerance is how big a color difference the wand should accept. Too high a value will measure outside the object, too low a value will not measure the whole object. Left-click once on the object and the contours will automatically be traced.
(Magic Wand) tool, adjust the tolerance and max points in the Settings menu. The tolerance is how big a color difference the wand should accept. Too high a value will measure outside the object, too low a value will not measure the whole object. Left-click once on the object and the contours will automatically be traced.
Note: The magic wand will sometimes be inaccurate, due to lack of contrast in the pictures. This tool is mainly used for measuring on drawn images
Edit a measurement
Use the  (Edit polyline) tool to adjust the figure after drawing. Upon selecting this tool, red dots will be added where the tracing points has been placed. These can now be dragged into a new position by dragging existing points. New points is added by clicking on the measurement line where there is no points. Points are removed by pressing Ctrl while clicking on the points.